I used this tech tip to embed the below pin in my blog post,
Reading Notes: Aesop's fables (Jacobs), part B. It is pretty neat that you can do this!! =)
pinit.js
I had a hard time figuring this one out. The instructions were a little confusing to me and the screen shot in the description looked a little different than what I see on my screen when I go to the widget builder site. So I decided to break it down for anyone else that has the same trouble I did. First, open a browser tab with the pin you want to embed. Then, open a second tab and go to the
pinterest widget builder web site. Your screen should look like this...
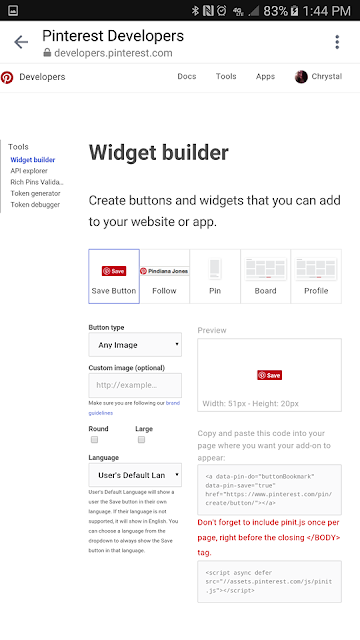 |
| (Personal photo; embed pinterest post screenshot 01, taken by me) |
Click on "Pin" as shown here...
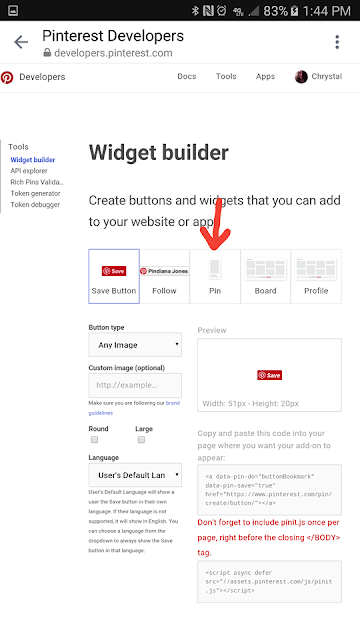 |
| (Personal photo; embed pinterest post screenshot 02, taken by me) |
Now you should be at this screen and you can copy the url from your pinterest post and past it here...
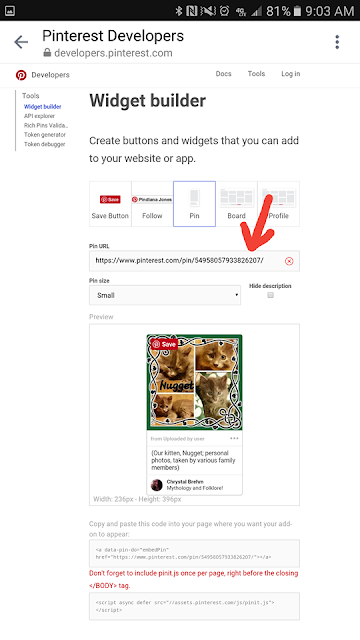 |
| (Personal photo; embed pinterest post screenshot 03, taken by me) |
That should place a preview of the pin you've chosen here...
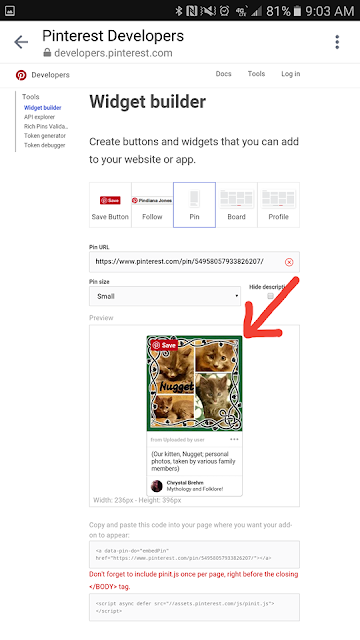 |
| (Personal photo; embed pinterest post screenshot 04, taken by me) |
Now, this is where it looks a little different than the "Tech Tips" instructions showed and where I started to get a little confused. I wasn't sure which link to paste. I tried just the top, then just the bottom, and finally both. None of the above worked. I started doing some research on how to embed a pin, because I was getting really frustrated. I found this
site that gave me a little more insight but their explanations were about the same and I was still unable to get it to work. I did however find out from this source that the links have to be by themselves, meaning there cannot be any other text included on the line where the code is pasted or it won't work. So, you have to use BOTH links (pointed out with red arrows below), paying particular close attention to the highlighted text here (because that was part of why mine wasn't working initially)...
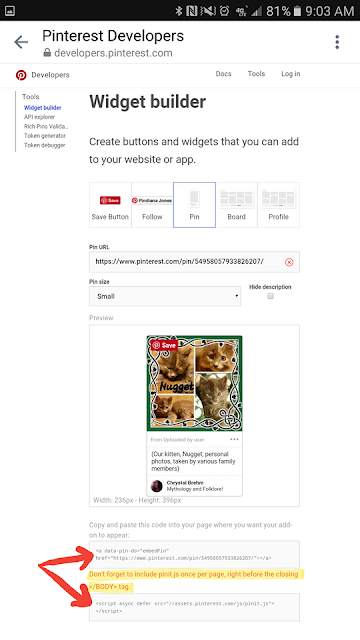 |
| (Personal photo; embed pinterest post screenshot 05, taken by me) |
First, you can copy the top link...
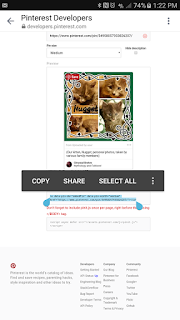 |
| (Personal photo; embed pinterest post screenshot 06, taken by me) |
and past it into the HTML area of your blogger post. If you aren't starting with an empty blog post, you'll need to label where you want the post to show up. You can place several random symbols or a phrase in all caps that will stand out, like "I WANT MY PIN HERE". That way when you click into the HTML area you have an easy reference to look for. Just make sure to delete this text from the HTML area once you've got the code in place, because this will keep it from working. Also, note the added text (highlighted below). This will NOT work if you forget this step!!!
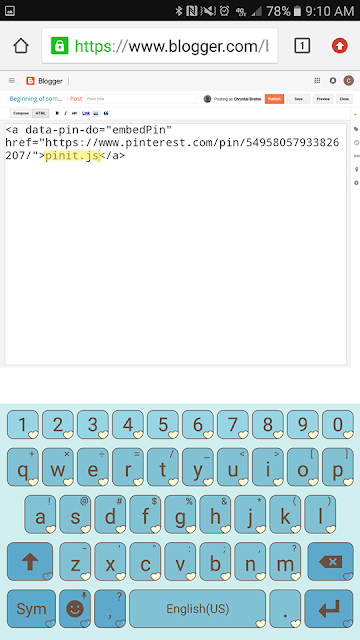 |
| (Personal photo; embed pinterest post screenshot 07, taken by me) |
Now, copy the second link from here...
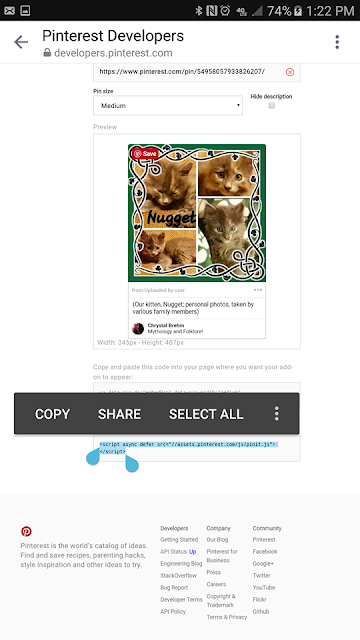 |
| (Personal photo; embed pinterest post screenshot 08, taken by me) |
and paste it into the HTML area as well. I tested it and it seems to work if you paste them end to end or if you place the second 1 line down from the first.
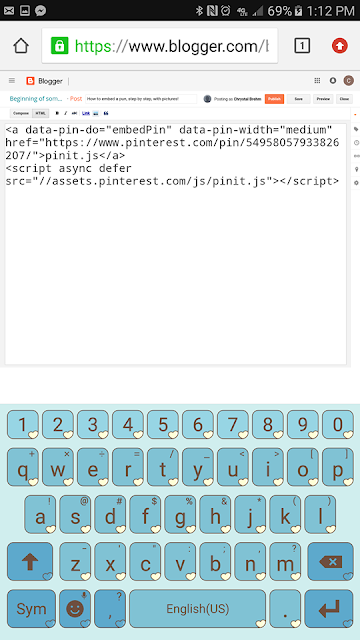 |
| (Personal photo; embed pinterest post screenshot 09, taken by me) |
Now you can go back to compose and you should see this.
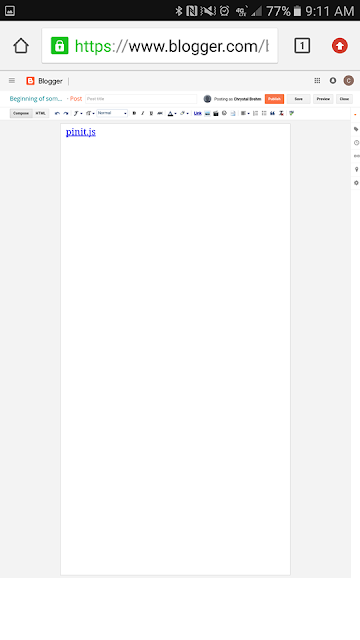 |
| (Personal photo; embed pinterest post screenshot 10, taken by me) |
I was getting rather frustrated when I saw this, because I thought I was doing something wrong (another part of why it "wasn't working" is because I thought this meant I had failed to do something important. Then I realized that this is just how it shows up in the editing phase). The pin has been embedded at this point. Go ahead and click "preview" and you should see your pin embedded in your preview!
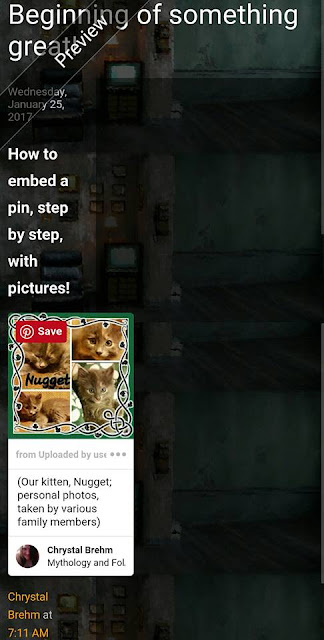 |
| (Personal photo; embed pinterest post screenshot 11, taken by me) |
Now you should be ready to publish your post or continue with your editing!! Hopefully this is helpful for some of you!


No comments:
Post a Comment